There’s still a bunch of these kicking around and the older they get, the more problems will come up. Here are the main ones I’ve seen over the years:
RS-232 power supply
- The electrolytic capacitor that helps the internal power supply generate the -10V for the RS-232 ports fails over time.
- Time between failures is typically a few years or more
- Symptoms include: intermittent or no communication to devices on RS-232 ports; low voltage on Tx pins of RS-232 ports; the Tx light for the RS-232 port on the front panel flashes, but the command doesn’t get sent
This seems to only occur so far in the older style control system. These can be recognised by the LEDs that protrude through the holes in the front panel (as opposed to the inset flat versions of the new style. The capacitor is in a different location depending whether the system is a x100 (e.g. NI-4100) or a x000 (e.g. NI-4000) system.
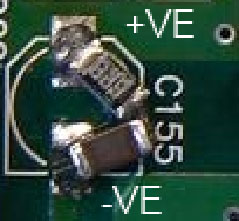
The recommended way of fixing this issue to replace the capacitor with a ceramic capacitor in series with a resistor (10uF 50V 1210 package and 6R8 0.25W 1206 package respectively.
The capacitor in the NI-x100 series is C206, close to the edge of the board near the Compact Flash card, here on the left (marked S2 10 35V):
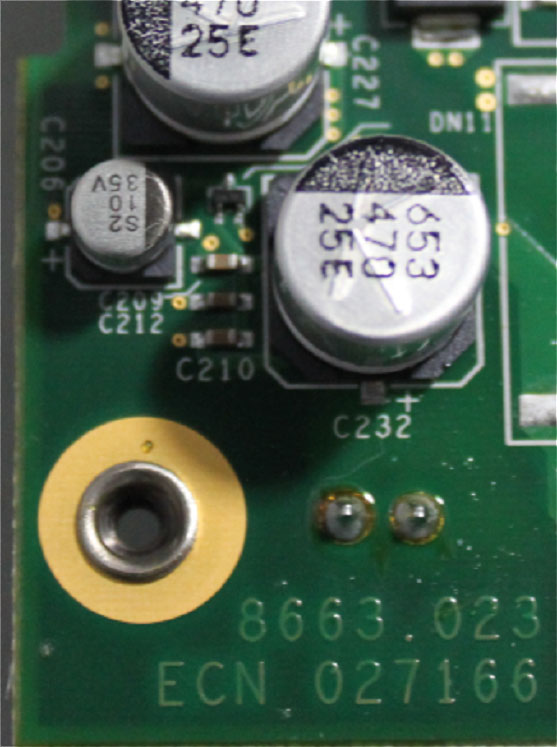
With the fix applied:
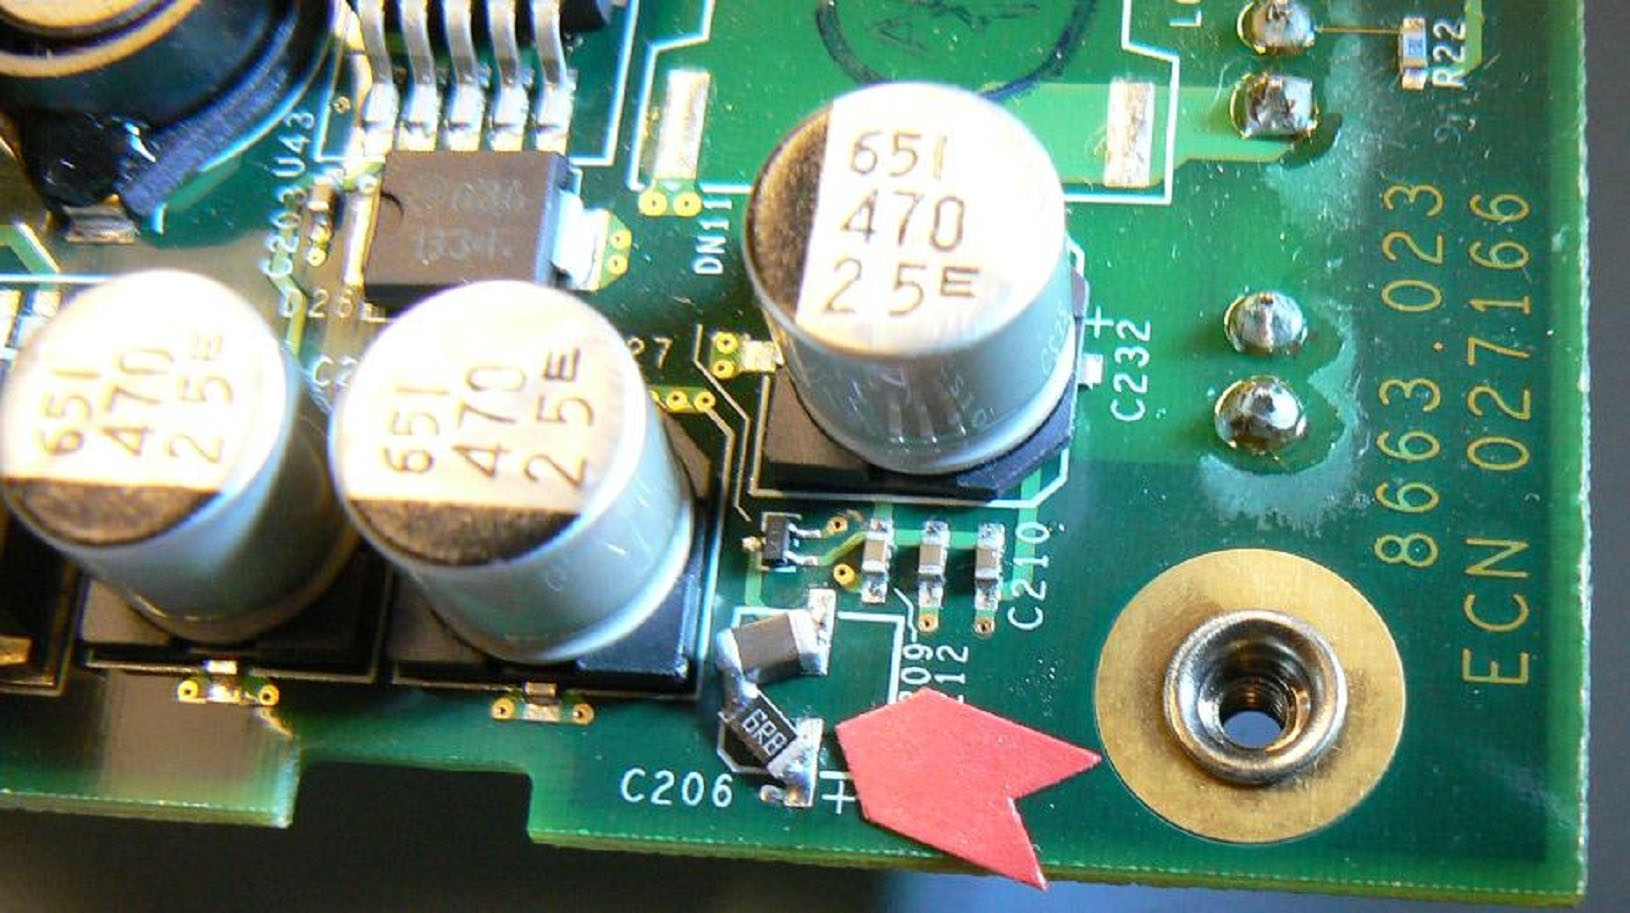
The capacitor in the NI-x000 series is C155, and from memory is in a similar place. Here’s what it looks like:
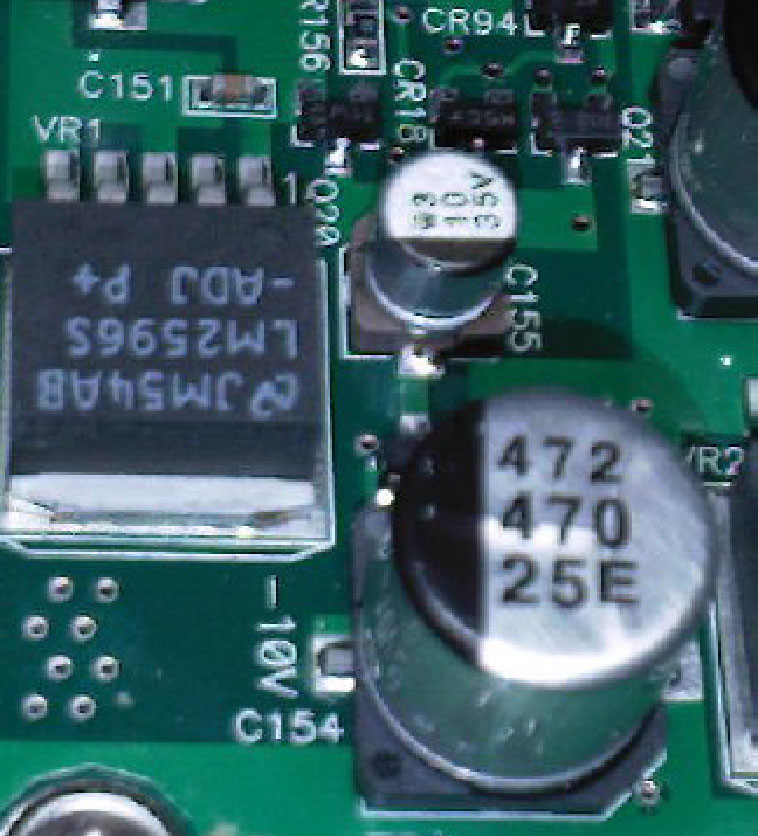
A closer view of the fix applied:
Using a through hole capacitor (e.g. 10uF 63V) in place of the SMD resistor-capacitor combo is usually effective (but not recommended by AMX). For example (on a NI-4100):
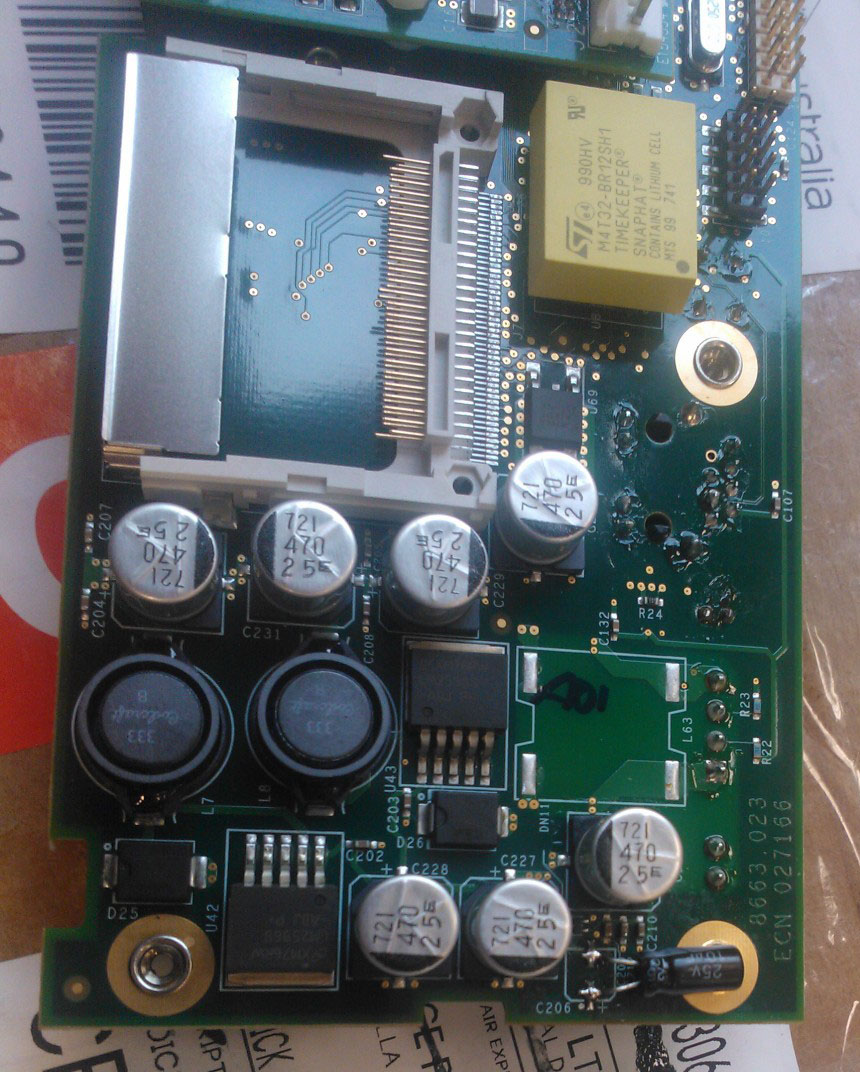
Compact Flash card
- The compact flash card inside the controller eventually runs out of read/write cycles
- Time between failures is dependent on the loaded program, but is typically 4-5 years
- Symptoms include: intermittent crashes, lockups or unresponsiveness
- This also happens on the older touch panels (e,g, NXx-CV10), it usually shows up when it gets stuck on the AMX logo while booting
The way to fix this is with a replacement Compact Flash card of same or bigger capacity (not too nuts though; 4-8GB is usually a good size). AMX recommends to use the SanDisk brand. This needs to be loaded with a backup of the system.
If you are lucky, you already have a backup of the system you are working on. Transferring the contents of the failed system’s card miiiight work, but chances are it’s already too corrupt. Next best is to have a backup of any system that has the same firmware version. Failing that you could try any backup you have and hope for the best. Sometimes it’s possible to get backup files from your local distributor (maybe AMX/Harman themselves? I haven’t tried…).
Previously (at least in Australia, not sure what’s done elsewhere), the backups were done using software called CompuApps OnBelay V2 (don’t be trapped by the V number; V3 is a different product, not a newer version of the same thing). These have a .FMB file extension. Unfortunately CompuApps doesn’t exist anymore, and so getting the software can be a hit and miss (especially the latest version). You want to use the Tools tab to select an ‘Exact duplicate’ backup and/or restore.
Now, software call HDD Raw Copy Tool is used instead. This generates a .IMG or .IMGC file extension.
Backup battery
- The controller has an onboard combined battery/clock (STMICROELECTRONICS M4T32-BR12SH1 TIMEKEEPER SNAPHAT) used for maintaining the time and program variables that fails over time
- Symptoms include: Loss of time in controller/touch panels; loss of non-volatile variable values between reboots
- This one is a lot less common, but I have still seen it pop up randomly. It’s easy enough to fix.
There is a yellow box looking thing next to the Compact Flash card. It is mounted to the board with clips on the short sides, and connects underneath with 4 pins. Take note of the orientation, and then gently remove it. Ideally you would use a DIP extractor tool to lift it evenly, but careful levering with a small screwdriver can work in a pinch.
Once that’s out, pop the new one in. Line it up in the same way and push down evenly until it clicks slightly on both ends.
NXC-VOL4 card
- The IC U1 (front left when looking at installed card) fails
- Symptoms include: Loss of volume and muting control; no front volume status LEDs work; front-left LED (CR13) stays solid instead of flashing, and middle LED (CR16) starts flashing
Shown below is the NXC-VOL4 card in same orientation as when it is installed:
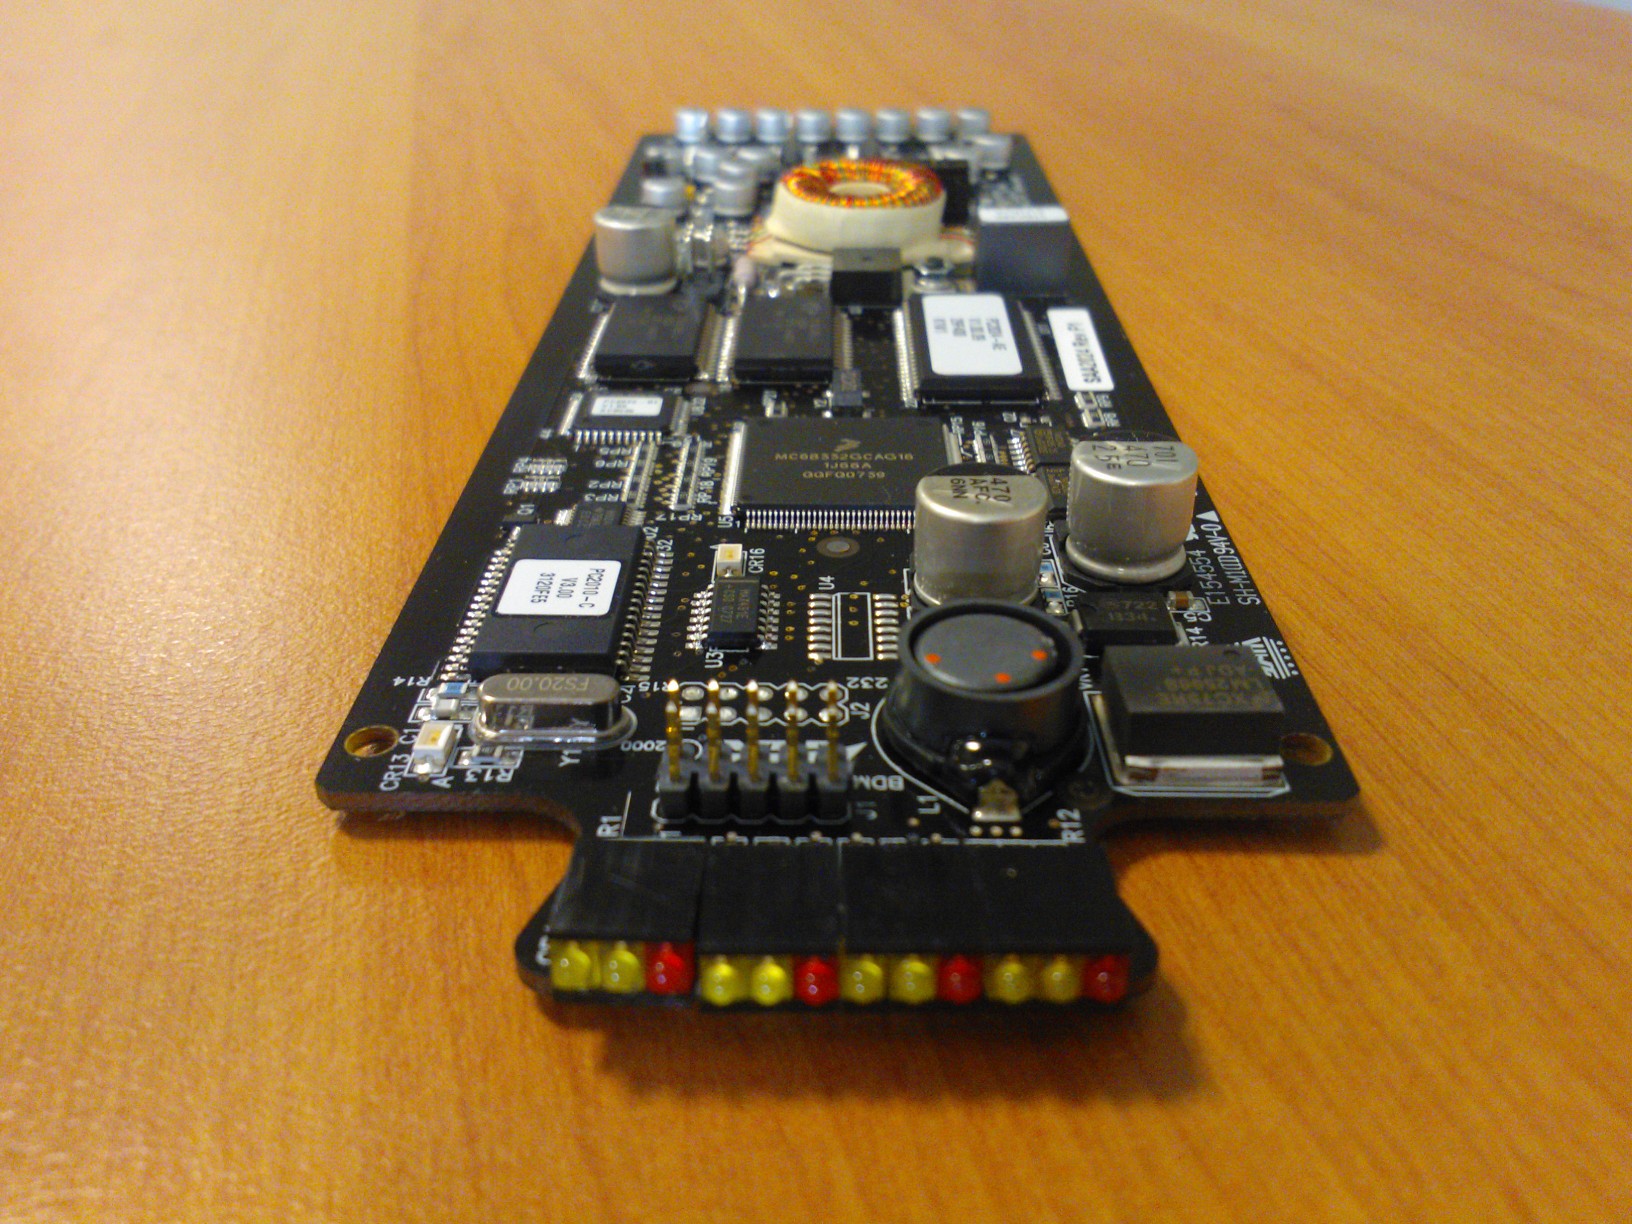
- The front row of LEDs illuminate when the volume is being controlled.
- The LED just next to the hole at the front-left (CR13) is the status light for the board, and in normal operation blinks roughly in time with the control system’s status LED.
- Behind that is the IC U1 (Toshiba tmpn3120fe5mg, LonWorks Neuron node controller), which is probably responsible for interfacing the card to the control system.
- To the right of U1 is another LED (CR16), which in normal operation is not lit.
Unfortunately, being a custom programmed chip the issue can’t be fixed in the field. The card needs to be sent back to AMX for repair or replacement. Or the customer is given a firm suggestion that maybe their system needs updating this century…
Bonus: DIP switches
Not a fault, but a quick tip for troubleshooting.
The DIP switches on the back are usually used to set the baud rate of the RS-232 port that you can program/configure the system through. Netlinx Studio has a guide under ‘Tools’ that looks like this:
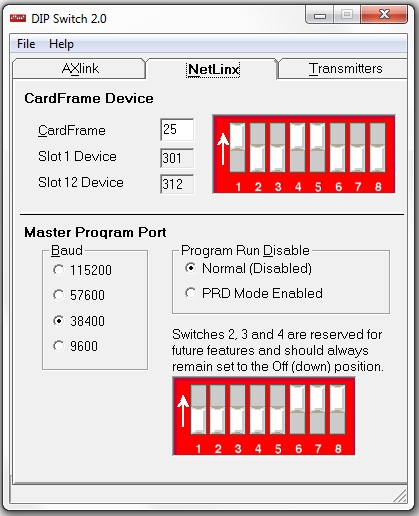
Shown is the Program Run Disable switch (#1). This is useful if you need to rule out the coding for any odd behavior, or the code causes the controller to be inaccesible.
What isn’t described however is switch #3, which activates back-end access through the RS-232 programming/configuration port at 115,200 baud. This is useful for debugging issues with the control system itself as it tells you the status of the OS as it boots, runs the program, checks memory, shows connecting devices, etc.
Who knows; it might come in handy one day.
